
-
By:
- dane
- No comment
worm factory 360 manual
Worm Factory 360 Manual: A Comprehensive Guide (Updated 02/18/2026)

This manual provides detailed instructions for setting up and maintaining your Worm Factory 360. Utilize ShopSavvy to monitor pricing and availability, ensuring a cost-effective and successful vermicomposting experience.
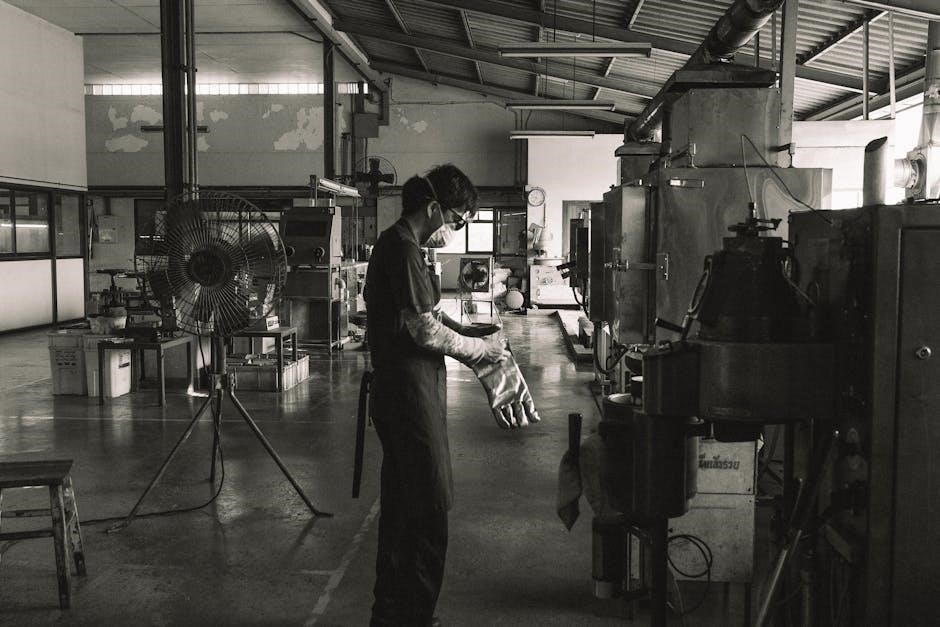
Vermicomposting, simply put, is using worms to decompose organic waste, creating a nutrient-rich fertilizer known as worm castings – often called “black gold” by gardeners! The Worm Factory 360 is a self-contained ecosystem designed to make this process efficient and odorless, even indoors.
This method offers a sustainable way to reduce landfill waste while simultaneously enriching your garden soil. Unlike traditional composting, vermicomposting doesn’t require turning or a large outdoor space. The Worm Factory 360’s stacked tray system allows worms to migrate upwards to fresh food, leaving finished castings behind for easy harvesting.
Whether you’re a seasoned gardener or a beginner, the Worm Factory 360 provides a straightforward path to creating a valuable soil amendment. This guide will walk you through each step, from initial setup to ongoing maintenance, ensuring a thriving worm bin and bountiful harvests. Remember to deeply research the product for optimal results!
What is a Worm Factory 360?
The Worm Factory 360 is a multi-tiered vermicomposting bin specifically designed for indoor use. It’s constructed of durable, recycled plastic and features a modular stacking system. This system consists of trays – working trays where worms live and feed, and a collection tray to gather nutrient-rich worm castings.
Unlike open bins, the 360’s design minimizes odors and prevents fruit flies. As worms consume food scraps in the working trays, they move upwards to new trays containing fresh food, leaving behind valuable castings in the trays below. This continuous migration simplifies harvesting.
The unit isn’t overly complicated to set up, and it doesn’t demand a significant amount of space. It’s an ideal solution for apartment dwellers or anyone seeking a convenient way to compost kitchen waste. Deep research into the product will reveal its efficiency and ease of use.
Benefits of Using a Worm Factory 360
Employing a Worm Factory 360 offers numerous advantages for both the home composter and the environment; Primarily, it transforms kitchen scraps into incredibly fertile worm castings – a superior soil amendment compared to traditional compost. This reduces landfill waste and minimizes your carbon footprint.
The system’s enclosed design effectively controls odors and deters pests like fruit flies, making it suitable for indoor use year-round. It’s a remarkably clean and efficient composting method, requiring minimal effort once established.
Furthermore, utilizing ShopSavvy to track pricing ensures you acquire the system at the best possible value. The resulting worm tea, a liquid byproduct, provides an exceptional liquid fertilizer for plants. It’s a sustainable, rewarding practice that benefits your garden and the planet.

Setting Up Your Worm Factory 360
Proper setup is crucial for a thriving worm bin. This section details the initial steps, from unboxing components to introducing your red wiggler worms successfully.
Unboxing and Component Identification
Upon receiving your Worm Factory 360, carefully inspect the box for any damage during shipping. Once opened, lay out all the components to ensure everything is present. You should find multiple stacking trays – typically four to eight, depending on the model – designed for worm migration and casting collection.
Identify the base tray, which collects any leachate (worm tea). This tray includes a spigot for easy draining. Next, locate the working trays where the worms will live and process food scraps. Also included are lid(s) to maintain moisture and darkness, and often a hand rake for bedding management.
A detailed parts list is usually included in the box; compare the contents to this list to confirm completeness. Familiarizing yourself with each component before assembly will streamline the setup process and ensure a smooth start to your vermicomposting journey. Retain the packaging and manual for future reference.
Assembling the Worm Factory 360 Trays
Assembly of your Worm Factory 360 is straightforward and requires no tools. Begin by placing the base tray on a level surface – this is crucial for proper leachate collection. Next, stack the working trays on top of the base, ensuring they sit securely within each other.
The trays are designed with interlocking rims to prevent shifting and maintain stability. Start with one working tray initially; you’ll add more as the worm population grows and processes bedding. Place the lid on top of the stacked trays to create a dark, moist environment for the worms.
Avoid over-stacking at the beginning. It’s better to start with fewer trays and add more as needed. This allows for easier management and prevents compaction of the bedding. Ensure the spigot on the base tray is securely closed before adding bedding and worms.
Preparing the Bedding Material
Bedding is the foundation of a thriving worm ecosystem. Ideal materials include shredded newspaper, cardboard, coconut coir, or peat moss. Avoid glossy or colored paper, as the inks can be harmful to worms. Moisten the bedding thoroughly – it should feel like a wrung-out sponge, not dripping wet.
Fluff the bedding to create air pockets, essential for worm respiration. A good starting point is approximately one pound of dry bedding material per tray. Mix in a handful of garden soil or compost to introduce beneficial microbes, aiding in decomposition.
Allow the moistened bedding to sit for about an hour before adding worms. This allows it to reach a stable moisture level and temperature. Properly prepared bedding provides a comfortable habitat, regulates moisture, and offers a food source for the worms as it breaks down.
Adding the Worms (Red Wigglers)
Introduce your red wigglers gently to their new home! Carefully spread the worms evenly across the surface of the prepared bedding. Avoid dumping them in a pile, as this can cause stress. Start with approximately one pound of worms for a standard Worm Factory 360 unit.
Dim the lights during introduction, as worms are sensitive to bright light. They will naturally burrow into the bedding to escape. It’s normal for some worms to initially remain on the surface; they will eventually acclimate.
Provide a small amount of food (fruit or vegetable scraps) on top of the bedding to encourage them to begin feeding and exploring. Observe the worms over the next few days to ensure they are settling in comfortably. A healthy worm population will quickly disappear into the bedding.

Feeding Your Worms
Proper feeding is crucial for a thriving worm colony. Offer a variety of acceptable food scraps, avoiding prohibited items, and maintain consistent feeding habits for optimal results.
What Worms Can Eat: Acceptable Food Scraps
Red wigglers are enthusiastic eaters, but they have preferences! A diverse diet keeps your worms healthy and productive. Excellent choices include fruit and vegetable scraps – apple cores, banana peels, carrot shavings, and lettuce leaves are all highly appreciated. Coffee grounds and tea bags (remove the staple!) provide nitrogen, boosting decomposition. Crushed eggshells offer grit, aiding in the worms’ digestive process.
Bread, pasta, and grains can be offered in small quantities. Consider these treats rather than staples. Paper products like shredded newspaper and cardboard are also beneficial, contributing to bedding and providing carbon. Remember to chop or blend larger scraps into smaller pieces to accelerate breakdown.
Avoid overfeeding! Start small and observe how quickly the worms consume the food. A good rule of thumb is to only add as much food as they can process within a few days.
What Worms Cannot Eat: Foods to Avoid
Certain foods are detrimental to your worm bin’s ecosystem and should be strictly avoided. Meat, dairy, and oily foods attract pests and create unpleasant odors, disrupting the delicate balance. Citrus fruits, while sometimes tolerated in small amounts, can make the bin too acidic. Onions and garlic, though flavorful to us, can be harmful to worms.
Processed foods, laden with salt, sugar, and preservatives, are unsuitable for worm consumption. Avoid anything spicy or heavily seasoned. Never add pet waste or diseased plants to your worm bin, as these can introduce harmful pathogens.
Be mindful of quantities even with acceptable foods. Too much of anything can cause problems. When in doubt, err on the side of caution and research before adding a new food item to your worms’ diet. A healthy bin is a balanced bin!
Feeding Frequency and Quantity
Establishing a consistent feeding schedule is crucial for a thriving worm bin. A good starting point is to feed your worms every 3-7 days, observing their consumption rate to adjust accordingly. Begin with small quantities – approximately 1/4 to 1/2 pound of food scraps per week for a standard Worm Factory 360 with a healthy worm population.
Monitor how quickly the worms consume the food. If scraps remain untouched after several days, reduce the amount offered. Conversely, if the food disappears rapidly, you can gradually increase the quantity. Avoid overfeeding, as this can lead to anaerobic conditions and unpleasant odors.
Distribute food evenly across the bin to encourage worms to spread out. Remember, consistency and observation are key to determining the optimal feeding frequency and quantity for your specific worm bin.
Burying Food Scraps Properly
Properly burying food scraps is essential for maintaining a healthy and odor-free Worm Factory 360. Always dig a small hole in the bedding material – at least 4-6 inches deep – and deposit the food waste inside. Cover the scraps completely with bedding, ensuring no food is exposed.
This practice prevents fruit flies and minimizes odors by discouraging their access to the food. Rotating feeding locations within the bin each time you add scraps further distributes the nutrients and encourages worm activity throughout the system.
Avoid piling food on top of the bedding, as this creates an anaerobic environment. Consistent and thorough burial is a simple yet vital step in successful vermicomposting, promoting a balanced and productive worm bin ecosystem.

Maintaining Your Worm Factory 360
Regular maintenance ensures a thriving worm bin. Focus on moisture control, aeration, and temperature regulation to create an optimal environment for your red wigglers.
Moisture Control: Keeping the Bedding Damp
Maintaining the correct moisture level is crucial for a healthy worm bin. The bedding should feel like a wrung-out sponge – damp, but not soggy. Too much moisture leads to anaerobic conditions, causing foul odors and potentially harming your worms. Conversely, dry bedding can injure or kill them.
To check moisture, squeeze a handful of bedding. If water drips out, it’s too wet. Add dry shredded cardboard or newspaper to absorb excess moisture. If the bedding feels dry and crumbles, lightly mist it with water using a spray bottle. Avoid overwatering, as it’s easier to add moisture than to remove it.
Regularly monitor the bin, especially during warmer months, as evaporation increases. Consider covering the top tray with damp burlap or a newspaper to help retain moisture. Proper moisture balance is key to a productive and odor-free Worm Factory 360.
Aeration: Ensuring Proper Oxygen Flow
Worms require oxygen to thrive, making aeration a vital aspect of Worm Factory 360 maintenance. Without sufficient airflow, anaerobic bacteria will dominate, creating unpleasant odors and hindering decomposition. The Worm Factory 360’s design inherently provides some aeration through the tray system, but additional steps are often necessary.
Regularly fluffing the bedding – gently mixing it with your hands or a garden fork – introduces oxygen. Avoid compacting the bedding by overfilling trays or adding large amounts of food at once. The small holes in the trays also facilitate airflow, but ensure they aren’t blocked by food scraps or castings.
Consider occasionally lifting the entire stack of trays to allow for increased air circulation. Proper aeration contributes to a healthy worm environment, efficient composting, and a virtually odorless system.
Temperature Regulation: Optimal Worm Environment
Maintaining the correct temperature is crucial for worm health and composting efficiency within your Worm Factory 360. Red wigglers thrive in temperatures between 55°F and 77°F (13°C ‒ 25°C). Temperatures outside this range can stress the worms, reducing their activity and even causing mortality.
Avoid placing your Worm Factory 360 in direct sunlight or near heat sources. In colder climates, insulate the bin with blankets, cardboard, or move it to a more sheltered location like a basement or garage. Conversely, in warmer climates, provide shade and consider adding frozen water bottles (sealed in plastic) to the bedding for temporary cooling.
Consistent temperature is more important than achieving a specific number. Fluctuations should be minimized. Monitoring the bedding temperature with a simple thermometer will help ensure a comfortable and productive environment for your worms.
Troubleshooting Common Problems: Odors, Fruit Flies
Addressing issues like odors and fruit flies is essential for a pleasant vermicomposting experience with your Worm Factory 360. Unpleasant smells usually indicate an imbalance – often too much food or insufficient aeration. Ensure food scraps are thoroughly buried and avoid overfeeding. Adding more bedding material can help absorb excess moisture and balance the carbon-to-nitrogen ratio.
Fruit flies are attracted to exposed food and overly moist conditions. Cover food scraps completely with bedding. A layer of shredded newspaper or coconut coir on top of the bedding acts as a barrier. You can also create a simple fruit fly trap using apple cider vinegar and a drop of dish soap.
Regular maintenance and proper feeding practices are the best preventative measures. If problems persist, check for anaerobic conditions (lack of oxygen) and adjust accordingly.

Harvesting Worm Castings
Regular harvesting yields nutrient-rich castings for your garden. Utilize migration, dumping, or sorting methods to separate worms from their valuable, finished compost product.
Understanding the Harvesting Process
Harvesting worm castings is a crucial step in continuous vermicomposting. It’s not about collecting all the castings at once, but rather removing the finished product from the lower trays of your Worm Factory 360 as it becomes available. Worms naturally migrate upwards through the trays in search of fresh food sources, leaving behind their nutrient-rich castings in the trays they’ve already processed.
This upward migration is the key to efficient harvesting. The process isn’t disruptive to the worm colony, and allows for ongoing compost production. Understanding this behavior is fundamental to maximizing your worm bin’s output. Regularly checking the lower trays – typically every 1-3 months, depending on feeding rates – will reveal layers of dark, earthy castings ready for use in your garden.
Successful harvesting ensures a healthy, productive worm bin and a continuous supply of valuable fertilizer for your plants. It’s a win-win for both your worms and your garden!
The Migration Method for Harvesting
The migration method is the most recommended harvesting technique for the Worm Factory 360. It leverages the worms’ natural instinct to move towards food. To begin, stop feeding in the tray you wish to harvest. Add fresh bedding and food scraps to the top tray, enticing the worms to migrate upwards.
After a week or two, most worms will have moved into the upper trays. Remove the bottom tray, which should now contain primarily castings with a minimal number of worms. Gently separate any remaining worms and return them to the active trays.
This method is gentle on the worms, minimizes disturbance, and ensures a high-quality harvest. Repeat this process for each tray as needed, maintaining a continuous cycle of composting and harvesting. It’s a simple, effective way to reap the benefits of your worm’s hard work!
Dumping and Sorting Methods
For quicker harvesting, the dumping and sorting method can be employed, though it’s more labor-intensive. Carefully dump the contents of a tray onto a large tarp or sheet of plastic. Create cone-shaped piles of castings and expose them to bright light – worms will burrow downwards to avoid it.
Over time, gradually remove the top layers of castings, leaving the worms concentrated in the center. Hand-sort through the remaining material to collect any remaining worms and return them to an active tray. This method requires patience and a willingness to get your hands dirty!
While faster than migration, dumping and sorting can be stressful for the worms. Ensure a cool, damp environment during the process to minimize harm. It’s best suited for occasional harvests or when a quicker turnaround is needed.
Using Worm Castings: Benefits for Your Garden
Worm castings, often called “black gold,” are a phenomenal soil amendment, enriching your garden in countless ways. They are naturally rich in essential plant nutrients like nitrogen, phosphorus, and potassium, released slowly for sustained feeding.
Castings improve soil structure, enhancing aeration, drainage, and water retention. This creates a more hospitable environment for root growth. They also contain beneficial microbes that suppress plant diseases and promote overall plant health.
You can use castings as a top dressing around existing plants, mix them into potting soil, or brew them into worm tea for a liquid fertilizer. A little goes a long way – typically 10-20% castings mixed with soil is ideal. Expect vibrant growth, increased yields, and healthier, more resilient plants!

Advanced Worm Factory 360 Techniques
Explore expanding your system, managing worm populations, and creating nutrient-rich worm tea. Learn how to adapt your Worm Factory 360 for year-round success and optimal output.
Expanding Your Worm Factory 360
As your worm population grows, you might consider expanding your Worm Factory 360’s capacity. This is easily achieved by adding additional trays to the stacking system. Each tray provides more surface area for the worms to process food scraps and create valuable castings.
Before adding a tray, ensure the worms have fully colonized the existing trays – meaning food scraps are being consistently broken down. Simply stack the new tray on top of the existing ones, and add bedding material and a small amount of food to encourage the worms to migrate upwards.
Avoid adding too many trays at once, as this can overwhelm the worm population. A gradual expansion allows the worms to adjust and maintain optimal processing efficiency. Regularly monitor the system to ensure proper moisture levels and aeration throughout all trays. Expanding allows for increased composting volume and a continuous supply of worm castings!
Dealing with Overpopulation
An expanding worm population is generally a good sign, but overpopulation can lead to issues. Signs include worms clustering at the top of the trays, slowed food processing, and potential odors. Addressing this requires careful management, not drastic measures.
The primary solution is to add more trays to the Worm Factory 360, providing increased space for the worms to spread out and continue their composting work. Alternatively, you can harvest a portion of the worms and relocate them to a new bin or share them with fellow gardeners.
Avoid overfeeding, as excess food contributes to the problem. Ensure proper bedding depth and aeration to maintain a healthy environment. Regularly monitoring the system and proactively adding trays will prevent overpopulation and keep your worm farm thriving.
Worm Tea: Making and Using Liquid Fertilizer
Worm tea, also known as leachate, is a nutrient-rich liquid byproduct of vermicomposting. It’s a fantastic liquid fertilizer for your plants, brimming with beneficial microbes and readily available nutrients.
To collect worm tea, ensure your Worm Factory 360 has a spigot on the bottom tray. This tray will accumulate the liquid as worms process food. Collect the tea regularly, diluting it with water – a common ratio is 1:10 (tea to water) – before applying it to your garden.
Worm tea can be used as a foliar spray or soil drench. It promotes plant growth, strengthens root systems, and enhances overall plant health. Avoid applying it during peak sunlight to prevent leaf burn. Remember, worm tea is a supplement, not a replacement, for solid fertilizers.
Winterizing Your Worm Factory 360
As temperatures drop, your worm colony requires extra care to thrive. Worms are cold-blooded and their activity slows significantly in colder weather, impacting their digestion and breeding.
To winterize your Worm Factory 360, the key is insulation and maintaining a consistent temperature. Move the bin to a sheltered location like a garage, basement, or shed. Insulate the exterior with blankets, straw, or even cardboard.
Reduce feeding frequency as worm activity decreases. Avoid feeding frozen food scraps directly to the worms; thaw them first. Monitor moisture levels, as colder temperatures can lead to damp conditions. Ensure adequate ventilation to prevent anaerobic conditions. A slightly warmer bedding material can also help them stay comfortable throughout the winter months.