
-
By:
- dane
- No comment
honeywell th4210u2002 install manual
The Honeywell TH4210U2002 is a user-friendly, wall-mounted thermostat designed for 24V systems. It features a backlit display for easy navigation and efficient temperature control. Installation is straightforward, making it a convenient option for homeowners seeking precise climate management.
1.1 Overview of the Honeywell TH4210U2002 Model
The Honeywell TH4210U2002 is a reliable, 24V programmable thermostat designed for efficient temperature control. It features a backlit display for easy readability and compatibility with various HVAC systems, including heating and cooling units. Its user-friendly interface simplifies programming and adjustments, making it ideal for homeowners seeking precise climate management without complexity. The model is known for its durability and seamless integration into existing systems.
1.2 Importance of Proper Installation
Proper installation of the Honeywell TH4210U2002 thermostat is crucial for ensuring safe, efficient, and reliable operation. Incorrect wiring or setup can lead to system malfunctions, energy inefficiency, or even damage to the thermostat or HVAC system. A correct installation ensures optimal performance, accurate temperature control, and energy savings. Always follow the installation manual or consult a professional if unsure to avoid potential issues and maintain warranty validity.

Pre-Installation Requirements and Compatibility
Ensure the Honeywell TH4210U2002 is compatible with your HVAC system. Verify voltage requirements (24V) and system type. Proper compatibility ensures smooth operation and avoids installation issues.
2.1 System Compatibility Check
Verify the Honeywell TH4210U2002 is compatible with your HVAC system. It is designed for 24V systems and works with gas, electric, and heat pump configurations. Ensure your system matches the thermostat’s specifications to avoid installation issues. Always refer to the user manual for detailed compatibility requirements.
2.2 Tools and Materials Needed
To install the Honeywell TH4210U2002, gather essential tools: a screwdriver (both Phillips and flathead), wire strippers, pliers, and a voltage tester. Ensure you have the thermostat unit, mounting hardware, and instruction manual. Optional items include a wall anchor for uneven surfaces and a level for precise mounting. Organize all materials to streamline the installation process and avoid delays.
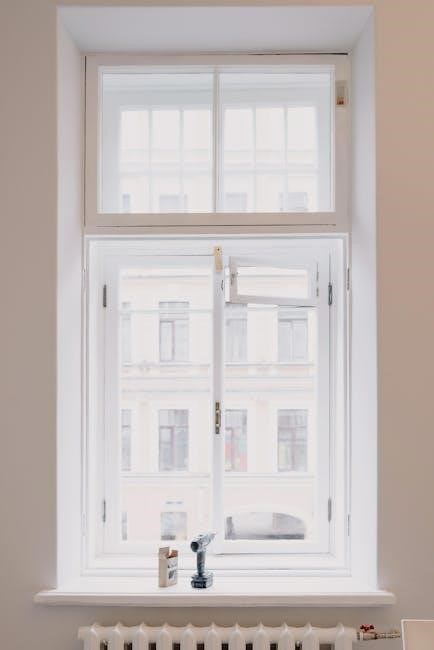
Unboxing and Initial Preparation
Carefully open the packaging and remove the Honeywell TH4210U2002 thermostat, ensuring all components are undamaged. The box includes the thermostat base, front plate, and user manual.
3.1 Unboxing the Thermostat
Open the Honeywell TH4210U2002 box carefully. Inside, you’ll find the thermostat unit, base plate, mounting hardware, and user manual. Inspect all items for damage; Ensure the thermostat is intact, and all components are included. Organize the parts neatly for a smooth installation process. Review the manual to familiarize yourself with the device before proceeding.
3.2 Inventory of Included Components
The Honeywell TH4210U2002 thermostat box includes the main unit, base plate, mounting screws, wall anchors, and user manual. Additional items may include wire labels, optional trim plate, and a quick-install guide. Ensure all parts are present before starting installation to avoid delays. Verify each component’s condition for proper functionality and safe setup.
Installation Steps
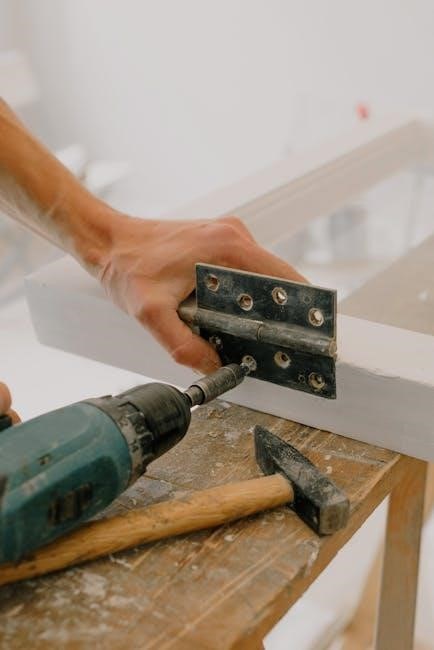
Start by turning off power to the HVAC system. Remove the old thermostat and mount the new base plate. Connect wires carefully, then attach the thermostat faceplate.
4;1 Mounting the Thermostat
Mount the Honeywell TH4210U2002’s base plate on a flat wall surface, ensuring level alignment. Use the provided screws to secure it firmly. If necessary, use wall anchors to prevent damage. Ensure the plate is centered and aligned properly for a neat appearance. Turn off the HVAC system power before proceeding to avoid electrical hazards during installation.
4.2 Connecting Wires to the Thermostat
Connect the HVAC system wires to the thermostat terminals, ensuring proper alignment with the wiring diagram. Match each wire to its corresponding terminal (e.g., R, W, Y, G, C). Secure the connections tightly to avoid loose wires; Double-check the wiring diagram from the user manual to confirm correct configuration. Turn off the system power before connecting to prevent electrical hazards.

Wiring Diagrams and Connections
Refer to the wiring diagram in the manual for correct terminal connections (R, W, Y, G, C). Ensure all wires are securely connected to their respective terminals. Always turn off power before connecting wires to avoid electrical hazards. Verify connections match your HVAC system configuration for proper functionality. Consult the manual for specific wiring instructions.
5.1 Understanding the Wiring Diagram
The wiring diagram provides a visual guide for connecting the thermostat to your HVAC system. It outlines the correct terminals (R, W, Y, G, C, etc.) and their functions. Ensure the wires match the diagram to avoid system malfunctions. Color coding on the wires can help identify their purpose, such as heating, cooling, or fan control. Always refer to the manual for specific wiring configurations.
Understanding the wiring diagram is crucial for a safe and proper installation. It helps prevent electrical issues and ensures compatibility with your HVAC system. If unsure, consult the manual or contact a professional installer for assistance. Proper wiring ensures optimal performance and safety of your thermostat and heating/cooling system. Always turn off power before making any connections to avoid electrical hazards.
5.2 Connecting to HVAC System
Connect the thermostat wires to the HVAC system terminals as indicated by the wiring diagram. Ensure the R (power) wire is connected to the correct terminal on both the thermostat and HVAC unit. Match other wires (W, Y, G, C, etc.) accordingly. Turn off power to the HVAC system before making connections to avoid electrical hazards. After wiring, test the system to ensure proper functionality and airflow. Proper connections ensure safe and efficient operation.
Initial Setup and Configuration
Power on the thermostat and follow the on-screen menu to set preferences. Choose between battery or hardwired power. Navigate through basic settings like temperature units and time format. Use the menu to enable features and customize your system for optimal performance. Refer to the user manual for detailed guidance on initial setup.
6.1 Powering On the Thermostat
Insert batteries or ensure hardwired power is connected. The screen should light up automatically. If the screen doesn’t turn on, check the circuit breaker or power switch. For battery models, ensure correct polarity. If hardwired, verify all connections are secure. The display will guide you through initial setup options. Refer to the user manual for troubleshooting if issues arise during power-on.
6.2 Navigating the On-Screen Menu
After powering on, the thermostat displays the main menu. Use the arrow buttons to scroll through options like schedule setup, temperature adjustment, and system mode. Select an option by pressing the center button. Navigate back using the ‘Menu’ button. The interface is intuitive, allowing easy access to advanced settings. Follow on-screen prompts to customize preferences and save changes for optimal performance.
Programming the Thermostat
The Honeywell TH4210U2002 allows programming for 7-day, 5-1-1, or 5-2 schedules. Set temperature and time preferences to optimize comfort and energy savings. Follow on-screen instructions to save settings.
7.1 Setting Up a Weekly Schedule
To set up a weekly schedule, navigate to the menu and select the “Schedule” option. Choose between 7-day, 5-1-1, or 5-2 day programming. Set your preferred temperature and time for each day. Use the arrow keys to adjust values and press “Save” to confirm. This feature allows you to customize comfort levels while optimizing energy usage. Ensure settings align with your daily routine for maximum efficiency.
7.2 Adjusting Temperature Settings
Adjust temperature settings by pressing the up or down arrows on the thermostat. Use the “Hold” option to override the schedule and maintain a constant temperature. Press “Run Schedule” to return to your programmed settings. Ensure temperature adjustments align with your comfort needs while considering energy efficiency. Regularly review and modify settings to optimize performance and energy savings throughout the day.
Advanced Features and Settings
The Honeywell TH4210U2002 offers advanced features such as energy-saving modes and programmable settings. These options enhance efficiency and provide customized comfort for your home environment.
8.1 Enable/Disable Features
The Honeywell TH4210U2002 allows users to enable or disable advanced features through its on-screen menu. This includes energy-saving modes, programmable settings, and manual overrides. Disabling unused features can streamline operation and optimize energy efficiency. Access these options by navigating to the settings menu and selecting the desired feature to toggle on or off, ensuring personalized comfort and system performance.
8.2 Energy-Saving Modes
The Honeywell TH4210U2002 features energy-saving modes that help reduce energy consumption. These modes adjust heating and cooling usage based on schedules or manual settings. By enabling energy-saving options, users can lower utility bills while maintaining comfort. The thermostat also allows customization of temperature setpoints to optimize efficiency without sacrificing performance, ensuring a balance between energy savings and desired indoor conditions.

Troubleshooting Common Issues
Common issues include the screen not turning on or fan running without airflow. Check power sources, circuit breakers, and ensure proper installation for quick resolution.
9.1 Screen Not Turning On
If the screen isn’t turning on, check the power source and ensure the circuit breaker is functioning. Verify wiring connections are secure and correct. For battery-powered models, ensure batteries are installed properly or try reversing them briefly. If issues persist, consult the user manual or contact Honeywell support for assistance.
9.2 Fan Running but No Airflow
If the fan runs but no airflow occurs, check for blockages in vents or ducts. Ensure the furnace door is securely closed and the system power switch is on. Verify circuit breakers aren’t tripped. Inspect air filters for cleanliness and replace if necessary. If issues persist, consult the user manual or contact Honeywell support for further troubleshooting assistance.

Maintenance and Upkeep
Regular maintenance ensures optimal performance. Clean the thermostat with a soft cloth to prevent dust buildup. Check and replace air filters as needed. Ensure all connections are secure and free from debris. For battery-powered models, monitor battery levels to avoid interruptions. Schedule annual professional inspections for comprehensive system checks and adjustments.
10.1 Cleaning the Thermostat
Cleaning the Honeywell TH4210U2002 thermostat is essential for maintaining functionality. Use a soft, dry cloth to gently wipe the display and exterior surfaces. Avoid harsh chemicals or liquids, as they may damage the screen. For tougher dust buildup, lightly dampen the cloth with water, but ensure it is not soaking wet. Regular cleaning prevents debris from interfering with temperature sensors and ensures accurate readings. This simple maintenance step prolongs the lifespan of your thermostat and keeps it operating smoothly.
10.2 Updating Software (If Applicable)
Some Honeywell models may require software updates for optimal performance. For the TH4210U2002, check the user manual or manufacturer’s website for any available updates. Typically, this thermostat does not require frequent software updates due to its straightforward design. However, if an update is needed, follow the on-screen instructions or consult the manual for guidance on safely updating the device without disrupting its functionality.
User Manual and Additional Resources
The Honeywell TH4210U2002 user manual provides detailed installation, programming, and troubleshooting guidance. Additional resources include online support, FAQs, and access to authorized technicians for assistance.
11.1 Navigating the User Manual
The Honeywell TH4210U2002 user manual is organized into sections for easy navigation. It starts with installation steps, followed by programming instructions, troubleshooting guides, and advanced features. Each section is clearly labeled, allowing users to quickly find the information they need. The manual also includes diagrams and step-by-step instructions to ensure a smooth setup process for all users.
11;2 Accessing Online Support
Honeywell provides comprehensive online resources for the TH4210U2002 thermostat. Visit the official Honeywell website to access installation guides, troubleshooting tips, and FAQs. Additionally, users can utilize live chat or contact customer support for personalized assistance. Online forums and video tutorials are also available, offering step-by-step solutions and expert advice to resolve any installation or operational issues efficiently.

Professional Installation Options
Find authorized professionals through Honeywell’s official website for expert installation. This ensures proper setup, optimal performance, and adherence to safety standards, avoiding potential DIY errors.
12.1 Finding Authorized Installers
To locate authorized installers for the Honeywell TH4210U2002, visit the official Honeywell website. Utilize their “Find a Pro” tool to search for certified professionals in your area. These technicians are trained to ensure proper installation, maintaining warranty validity and optimal system performance. Additionally, local HVAC companies often partner with Honeywell to provide reliable services.
12.2 Benefits of Professional Installation
Professional installation ensures the Honeywell TH4210U2002 thermostat is configured correctly, optimizing heating and cooling efficiency. Experts handle complex wiring and system compatibility, reducing risks of errors. They also provide maintenance tips and warranty support, enhancing long-term performance and homeowner satisfaction. This guarantees a seamless setup and reliable operation, tailored to your home’s specific needs.
Ensure the Honeywell TH4210U2002 thermostat is installed correctly and functioning smoothly. Verify all connections, test temperature settings, and confirm optimal system performance before finalizing the setup.
13.1 Verifying Proper Installation
Ensure the thermostat is securely mounted and level. Check all wire connections against the wiring diagram for accuracy. Verify the display lights up and responds to touch. Test basic functions like switching heating/cooling modes and adjusting temperatures. Confirm the system cycles on and off correctly. Ensure no unusual noises or errors occur during operation. Refer to the user manual if any issues arise during verification.
13.2 Ensuring Optimal Performance
Regularly clean the thermostat screen and ensure proper power supply. Check wiring connections for stability and avoid obstructions near the device. Adjust temperature sensitivity settings for precise control. Schedule periodic maintenance to ensure accuracy. Update software if available; Ensure the thermostat is level and installed away from direct sunlight or drafts for reliable operation. Refer to the user manual for advanced calibration options.