
-
By:
- dane
- No comment
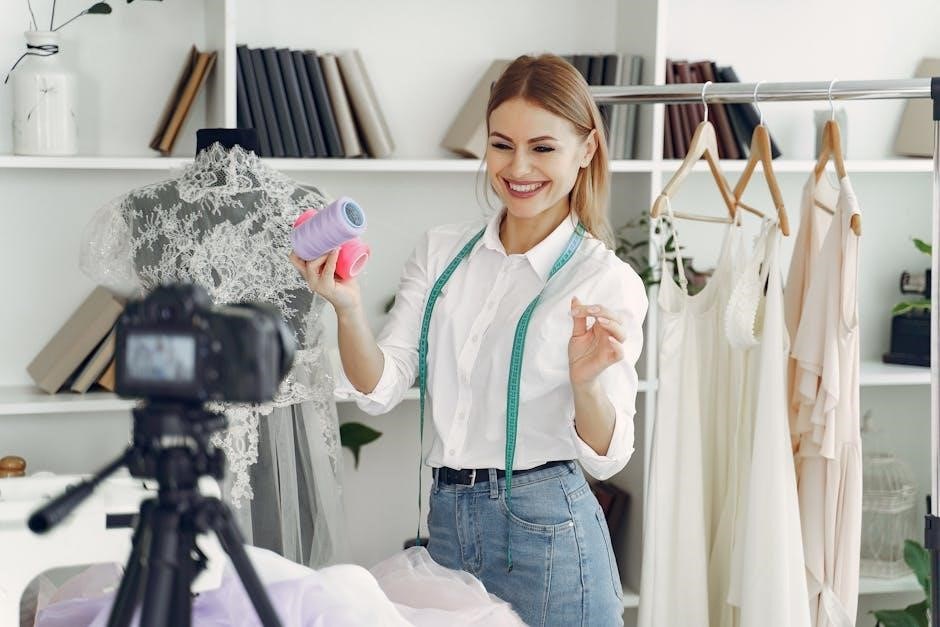
tutorial brother sewing machine
Brother sewing machines are renowned for their durability, ease of use, and versatility, making them ideal for both beginners and experienced sewists. They offer a wide range of models, from basic mechanical machines to advanced computerized ones, ensuring there’s a perfect fit for every sewing need. With innovative features and user-friendly designs, Brother machines empower creators to bring their sewing projects to life with precision and creativity.
1.1 Overview of Brother Sewing Machines
Brother sewing machines are versatile and user-friendly, catering to a wide range of sewing needs. From basic mechanical models to advanced computerized machines, Brother offers a variety of options. These machines are known for their durability, ease of use, and innovative features, making them suitable for both beginners and experienced sewists. Many Brother models come with pre-programmed stitches, automatic threading, and adjustable stitch lengths, ensuring precise and efficient sewing. Additionally, they often include accessories like presser feet for specialized tasks, such as zigzag stitching or buttonhole creation. Brother sewing machines are designed to simplify sewing projects, providing a seamless experience for crafting garments, home decor, and more.
1.2 Benefits of Using Brother Sewing Machines
Brother sewing machines offer numerous benefits, making them a popular choice for sewists. Their ease of use, versatility, and durability ensure a smooth sewing experience. Many models feature automatic threading and tension, reducing setup time. The wide range of stitch options caters to both simple and complex projects. Additionally, Brother machines are cost-effective and built to last, providing long-term value. They also come with accessories like presser feet, enhancing functionality. Whether for garments, home decor, or embroidery, Brother machines deliver precision and creativity. Their user-friendly designs make them ideal for beginners, while advanced features appeal to seasoned crafters, ensuring satisfaction across skill levels.
1.3 Target Audience for Brother Sewing Machine Tutorials
Brother sewing machine tutorials are designed for a diverse audience, including beginners, hobbyists, and DIY enthusiasts. These guides are perfect for individuals looking to master basic sewing skills or explore advanced techniques. Crafting communities, home sewers, and educators also benefit from the clear instructions and troubleshooting tips. Whether you’re creating garments, home decor, or embroidery, Brother tutorials cater to all skill levels. They provide step-by-step guidance for setting up, maintaining, and optimizing machine performance. Additionally, the tutorials are ideal for those seeking to enhance their creativity and productivity in sewing projects, offering a comprehensive resource for learners of all backgrounds and experience levels.
Setting Up Your Brother Sewing Machine
Setting up your Brother sewing machine is straightforward and stress-free. Follow the step-by-step guide to unbox, thread, and prepare your machine for seamless sewing experiences.
2.1 Unboxing and Initial Setup
Unboxing your Brother sewing machine is an exciting first step. Carefully remove the machine from its packaging and ensure all accessories, like the power cord, foot pedal, and presser feet, are included. Place the machine on a stable, flat surface. Familiarize yourself with the machine’s components, such as the spool pins, bobbin area, and stitch selectors. Plug in the machine and perform a test stitch to ensure it’s working properly. Refer to the user manual for specific setup instructions tailored to your model. Proper initial setup ensures smooth operation and helps you get started with your sewing projects right away.
2.2 Threading the Brother Sewing Machine
Threading your Brother sewing machine is a straightforward process when done correctly. Begin by turning on the machine and locating the spool pin. Place the thread on the spool and gently pull it through the machine’s upper threading path, following the diagrams provided on the machine. Ensure the thread is seated in the tension discs and guided through the take-up lever. Trim any excess thread and insert the bobbin into the bobbin case, making sure it’s aligned properly. Finally, thread the needle and pull the thread gently to secure it. Brother machines often feature automatic needle threaders, making this step even easier. Always refer to your specific model’s manual for precise instructions;
2.3 Winding and Installing the Bobbin
Winding and installing the bobbin is a crucial step in preparing your Brother sewing machine for use. Begin by placing the thread on the spool pin and gently winding it around the bobbin until it is evenly filled, avoiding overfilling.Cut the thread, leaving a small tail, and insert the bobbin into the bobbin case, ensuring it fits securely. For front-loading machines, open the bobbin compartment, place the bobbin inside, and pull the thread through the slot. Close the compartment and gently tug the thread to ensure it is properly seated. Always use the correct size bobbin for your machine, as specified in the manual, to ensure smooth operation. Properly wound and installed bobbins are essential for consistent stitching and trouble-free sewing.
2.4 Replacing the Needle
To replace the needle on your Brother sewing machine, start by turning it off and unplugging it for safety. Locate the needle clamp screw, which holds the needle in place. Loosen this screw counterclockwise to remove the old needle. Once the screw is loosened, gently pull out the old needle. Take the new needle and insert it into the needle clamp, ensuring the flat side faces the back of the machine for proper alignment. Tighten the needle clamp screw clockwise until it’s securely fastened. Be careful not to overtighten to avoid stripping the screw. Finally, plug in the machine and test it by sewing a few straight lines to ensure everything works smoothly. Regular needle replacement is essential to maintain stitching quality and prevent fabric tears or thread breakage. Always use the appropriate needle type for your fabric to achieve the best results.
Basic Sewing Operations
Mastering basic sewing operations with your Brother machine involves sewing straight lines, zigzag stitches, and adjusting stitch settings. These foundational skills are essential for all sewing projects.
3.1 Sewing Straight Stitches
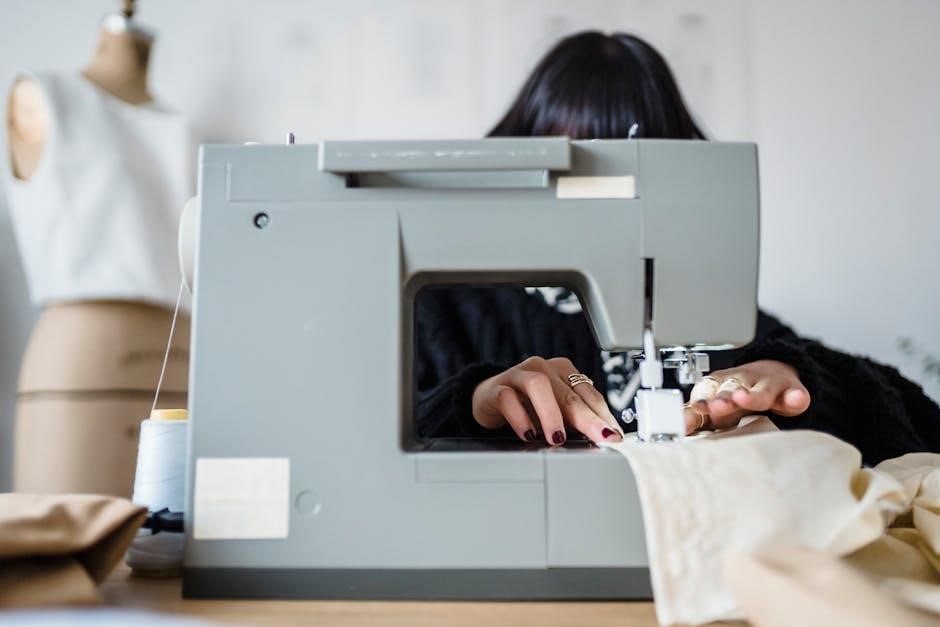
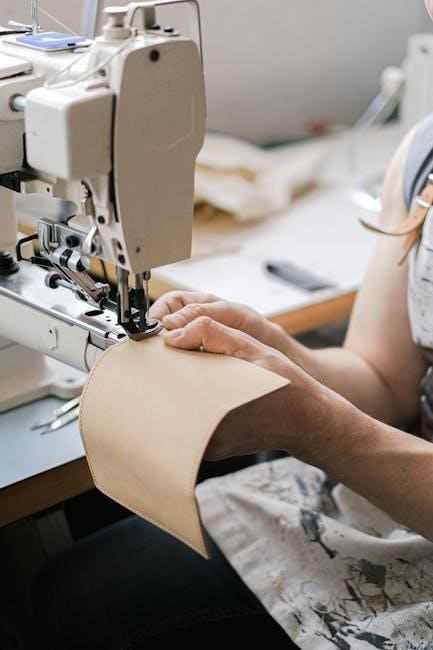
Sewing straight stitches is a fundamental skill when using a Brother sewing machine. Start by selecting the straight stitch option, usually denoted by a straight line or stitch number one. Ensure the machine is properly threaded, with the presser foot down; Place your fabric under the needle, aligning the edge with the machine’s guide. Gently press the start button or use the foot pedal to begin sewing. Keep the fabric steady and move it smoothly in a straight line. To secure the seam, backstitch at the beginning and end by reversing the stitch direction. This creates a clean, professional finish for your project.
3.2 Sewing Zigzag Stitches
Sewing zigzag stitches with a Brother machine is essential for preventing fabric fraying and adding decorative touches. Begin by selecting the zigzag stitch option, typically found on the stitch selection menu. Attach the zigzag foot to ensure proper fabric movement. Place your fabric under the needle, aligning the edge with the machine’s guide. Start sewing slowly, using the foot pedal or start button. Guide the fabric smoothly, maintaining consistent tension to achieve even stitches; For stretchy fabrics, increase the stitch width for better elasticity. Experiment with different widths and lengths to suit your project needs, ensuring a professional finish for hems, seams, or embellishments.
3.3 Using the Basic Stitch Settings
Mastering the basic stitch settings on your Brother sewing machine is key to versatile sewing. Start with the straight stitch for general sewing, ensuring proper fabric alignment. For stretchy fabrics, switch to the zigzag stitch, adjusting the width for better elasticity. The machine also offers decorative stitches, ideal for embellishments. Use the menu or buttons to select stitches, and adjust length and width as needed. Always test stitches on scrap fabric before sewing your project; This ensures the settings match your fabric type and desired outcome. Experimenting with these settings will enhance your sewing skills and expand your creative possibilities for various projects. Proper stitch selection ensures professional results every time.
Advanced Sewing Functions
Explore advanced features like creating custom buttonholes, using the blind hem stitch, and adjusting stitch length/width for precise control over various fabrics and projects.
4.1 Creating Buttonholes
Creating buttonholes is a fundamental skill for garment construction. Brother sewing machines offer automatic and manual buttonhole functions, ensuring precise results. For automatic buttonholes, use the buttonhole foot and select the desired stitch. Place your fabric under the foot, aligning the buttonhole markings. Start sewing, and the machine will create perfect buttonholes. For manual buttonholes, use a zigzag stitch with specific width and length settings. Practice on scrap fabric to achieve consistent results. Brother machines like the CS7000i and A150 feature one-step buttonhole settings, making the process effortless. Always refer to your machine’s tutorial for model-specific guidance. This feature is a time-saver for sewing enthusiasts.
4.2 Using the Blind Hem Stitch
The blind hem stitch is a versatile feature on Brother sewing machines, ideal for creating nearly invisible hems on garments. To use this stitch, select the blind hem stitch option (typically stitch #11) and attach the blind hem foot. This foot helps guide the fabric and conceals the stitches on the underside. Place your fabric edge under the foot, aligning it with the guide. Sew slowly, keeping the fabric steady to ensure even stitching. The blind hem stitch is perfect for pants, skirts, and curtains, giving a professional finish. Practice on scrap fabric to master the technique, ensuring your hems are seamless and undetectable from the outside.
4.3 Adjusting Stitch Length and Width
Adjusting the stitch length and width on your Brother sewing machine allows for precise control over your sewing projects. The stitch length determines how much fabric is sewn between each stitch, while the width adjusts the stitch’s side-to-side measurement. To modify these settings, locate the stitch length and width dials or buttons on your machine. For most models, turning the dial or pressing the corresponding button will change the settings. Always test the stitches on scrap fabric before sewing your final project to ensure the desired results. This feature is especially useful for different fabrics and techniques, ensuring your stitches are tailored to your specific needs. Refer to your machine’s manual for exact instructions, as settings may vary by model.
Maintenance and Troubleshooting
Regular maintenance ensures optimal performance of your Brother sewing machine. Clean the machine, oil it when needed, and address common issues promptly to keep it functioning smoothly.
5.1 Cleaning the Brother Sewing Machine
Cleaning your Brother sewing machine is essential for maintaining its performance and longevity. Start by turning off the machine and unplugging it for safety. Remove any fabric scraps or loose threads from the work area. Use a soft brush or a vacuum cleaner to gently sweep away dust and debris from the machine’s exterior and internal components, such as the bobbin area and tension discs. Avoid using harsh chemicals or abrasive materials, as they may damage the machine’s finish. For stubborn dirt, a slightly damp cloth can be used, but ensure no moisture enters the machine’s internal mechanisms. Regular cleaning prevents dust buildup and ensures smooth operation. Always refer to your user manual for specific cleaning instructions tailored to your machine model;
5.2 Oiling the Machine
Oiling your Brother sewing machine is crucial for maintaining its mechanical components and ensuring smooth operation. Locate the oiling points, typically found near the bobbin area or outlined in your user manual. Use only the high-quality sewing machine oil recommended by Brother to prevent damage. Apply a few drops to the specified areas, then gently turn the handwheel to distribute the oil evenly. Avoid over-oiling, as excess can attract dust and interfere with performance. Regular oiling, ideally after cleaning or as indicated in the manual, keeps the machine running efficiently and extends its lifespan. Always refer to the manual for model-specific oiling instructions to maintain optimal functionality.
5.3 Common Issues and Solutions
Common issues with Brother sewing machines include thread bunching, improper stitching, or machine jamming. These often result from incorrect threading, misaligned bobbin placement, or using low-quality thread. To resolve, turn off the machine, remove any tangled thread, and rethread following the manual’s guidelines. Ensure the bobbin is properly seated and the tension is balanced. For uneven stitches, check the needle size and type, ensuring it matches your fabric. Regularly cleaning lint and debris from the machine’s interior can also prevent malfunctions. If issues persist, refer to the user manual or Brother’s official troubleshooting resources for detailed solutions tailored to your model.
5.4 Resetting the Machine to Factory Settings
To reset your Brother sewing machine to factory settings, start by locating the reset option in the machine’s menu. Press and hold the ‘Menu’ button, then navigate to the ‘Settings’ or ‘Setup’ option using the arrow keys. Scroll down to find the ‘Factory Reset’ or ‘Restore Defaults’ option and select it. Confirm your choice when prompted. This process will revert all custom settings to their original state, so ensure you have saved any personalized settings beforehand. After resetting, test the machine by sewing a straight line to verify proper function. For detailed guidance, refer to the user manual or Brother’s official website for instructional videos and troubleshooting tips. Regular resets can help maintain optimal performance and resolve software-related issues. Always follow the manufacturer’s instructions to avoid any potential damage to your machine.
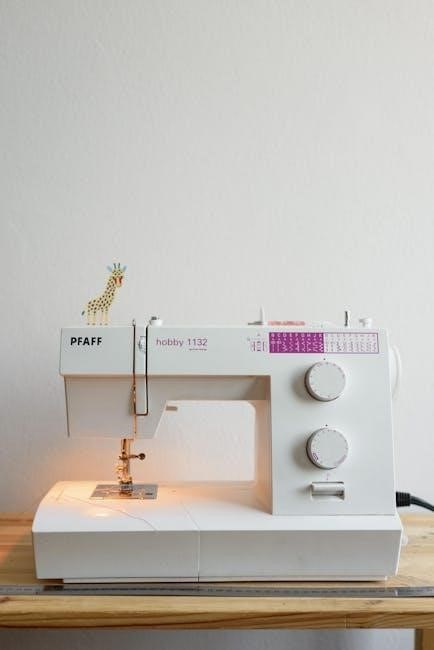
Brother Sewing Machine Models for Beginners
Popular Brother models for beginners include the CS7000i, A150, LS14S, and ST150HDH. These machines are user-friendly, offering essential stitches and features at an affordable price point.
6.1 Brother CS7000i Sewing Machine
The Brother CS7000i is a top choice for beginners, offering 70 built-in stitches, including decorative, heirloom, and quilting options. It features an automatic needle threader, a large LCD display, and a jam-resistant drop-in bobbin. The machine is lightweight and portable, making it easy to handle. Beginners appreciate its intuitive controls and clear stitching guide. The CS7000i also includes seven presser feet, allowing for versatility in projects like garment construction, home decor, and crafting. Its affordable price and robust features make it an excellent starting point for those new to sewing, providing everything needed to learn and grow in their sewing journey.
6.2 Brother A150 Sewing Machine
The Brother A150 Sewing Machine is a compact and lightweight model designed for ease of use, making it perfect for beginners. It features 150 built-in stitches, including straight, zigzag, and decorative options, allowing for versatility in sewing projects. The machine includes an automatic needle threader and a drop-in bobbin system, simplifying setup. It also comes with five interchangeable presser feet, enabling users to tackle various tasks like zigzag stitching and buttonhole creation. The A150 is known for its quiet operation and user-friendly interface, making it an excellent choice for those looking to learn sewing basics without overwhelming complexity. Its portability and affordability further enhance its appeal for new sewists.
6.3 Brother LS14S Sewing Machine
The Brother LS14S Sewing Machine is a reliable, mechanical model designed for simplicity and durability. It features 14 built-in stitches, including essential straight and zigzag stitches, perfect for basic sewing tasks. The machine is lightweight and easy to operate, making it an excellent choice for beginners who want to focus on learning fundamental sewing skills. The LS14S includes a built-in carry handle for portability and comes with three presser feet for versatility. Its straightforward design ensures minimal setup and hassle-free operation. Additionally, Brother provides comprehensive tutorials and online resources to help users master the LS14S, making it a great option for those new to sewing who want a no-frills, dependable machine.
6.4 Brother ST150HDH Sewing Machine
The Brother ST150HDH Sewing Machine is a heavy-duty, versatile model designed for both beginners and experienced sewists. It features a powerful motor and a robust construction, making it ideal for sewing thick fabrics like denim and canvas. The machine includes 50 built-in stitches, a large sewing area, and a walking foot for smooth fabric handling, perfect for quilting and heavy-duty projects. Its user-friendly interface and clear stitch selection ensure ease of operation. The ST150HDH is also equipped with a free-arm design for sewing cuffs and sleeves. Brother provides detailed tutorials and resources to help users maximize the machine’s potential, making it a great choice for those looking to tackle a variety of sewing tasks with confidence and precision.
Using Brother Sewing Machine Accessories
Brother sewing machine accessories offer a variety of functional tools like the Buttonhole Foot and Zigzag Foot, essential for professional stitching and versatile sewing options. Brother provides tutorials to help master these accessories and enhance your sewing skills.
7.1 Buttonhole Foot
The Buttonhole Foot is a versatile accessory designed to create precise, professional-looking buttonholes with ease. It is compatible with most Brother sewing machines and simplifies the buttonhole-making process. The foot guides fabric smoothly, ensuring consistent stitching and even spacing. Tutorials often highlight its ease of use, making it ideal for both beginners and experienced sewists. By attaching the Buttonhole Foot, users can select from various buttonhole styles on their machine, achieving flawless results. This accessory is especially useful for garment construction, such as sewing shirts or pants. Brother provides step-by-step instructions to master the Buttonhole Foot, ensuring users can enhance their sewing projects with professional finishes.
7.2 Zigzag Foot
The Zigzag Foot is a must-have accessory for Brother sewing machines, designed to handle a variety of stitching techniques with precision. It is ideal for sewing stretchy fabrics, reinforcing seams, and creating decorative edges. The foot allows for smooth fabric movement, ensuring consistent zigzag stitching. Tutorials often demonstrate its versatility in projects like garment construction and home decor. By using the Zigzag Foot, users can explore creative stitching options, from basic overlocking to intricate designs. Brother machines offer multiple zigzag stitch settings, making it easy to customize projects. This accessory is a great tool for enhancing sewing skills and expanding creative possibilities, perfect for both beginners and experienced sewists. Brother provides detailed guides to help users master the Zigzag Foot’s functionalities.
Sewing Projects for Beginners
Start with simple straight stitch projects like pillowcases or tote bags. Gradually move to basic garment construction, such as skirts or elastic waistbands. These projects build skills and confidence, allowing you to apply fundamental techniques effectively.
8.1 Simple Straight Stitch Projects
Simple straight stitch projects are perfect for beginners, helping build confidence and foundational sewing skills. Start with basic items like pillowcases, tote bags, or fabric coasters. These projects require minimal fabric and time, making them ideal for practice. Straight stitches are easy to master and can be used for hemming pants, repairing seams, or creating simple home decor. Use Brother sewing machine tutorials to guide you through these tasks, ensuring your stitches are even and consistent. As you progress, you can move on to more complex projects, but these simple tasks lay a solid groundwork for your sewing journey.
8.2 Basic Garment Construction
Basic garment construction is a fundamental skill for sewists, allowing you to create custom clothing and accessories. Start with simple projects like skirts, elastic waistbands, or drawstring bags. These projects teach essential techniques such as accurate measuring, fabric cutting, and proper seam alignment. Brother sewing machine tutorials provide step-by-step guidance on using straight and zigzag stitches for secure seams. Learn how to handle different fabrics, from lightweight cotton to stretch materials. Practice hemming, gathering, and attaching closures like buttons or zippers. With practice, you’ll gain confidence in creating garments that fit perfectly. Brother’s resources offer tips on pressing seams and backstitching for professional finishes, helping you master garment construction from start to finish.
Brother Sewing Machine Tutorials and Resources
Brother offers extensive video tutorials, blogs, and guides to help users master sewing techniques. These resources cover basic operations, troubleshooting, and advanced features, ensuring comprehensive support for all skill levels.
9.1 Official Brother Sewing Machine Videos
Brother provides an extensive library of official video tutorials designed to guide users through various sewing machine operations. These videos cover basic functions like threading, bobbin winding, and straight stitching, as well as advanced techniques such as creating buttonholes and using specialized feet. The tutorials are tailored for different skill levels, ensuring both beginners and experienced sewists can benefit. Many videos focus on specific models, such as the Brother CS7000i and ST150HDH, offering model-specific tips and tricks. With clear step-by-step instructions and visual demonstrations, these resources help users master their machines efficiently. They are available on Brother’s official website and YouTube channel, making it easy for anyone to access expert guidance anytime. Regular updates ensure the content stays relevant and addresses the latest features and models.
9.2 Brother Sewing Blog Tips and Tricks
The Brother Sewing Blog is a valuable resource for sewists of all levels, offering practical tips, tricks, and inspiration. It features articles on mastering basic skills like threading and stitch selection, as well as advanced techniques such as embroidery and quilting. The blog often shares step-by-step guides for common sewing tasks and provides creative ideas for projects using Brother machines. Additionally, it highlights solutions to common issues and ways to optimize machine performance. Regular updates ensure users stay informed about the latest trends, features, and accessories. Whether you’re a beginner or an experienced sewer, the Brother Sewing Blog is a go-to destination for enhancing your sewing skills and staying inspired.
10.1 Final Tips for Mastering Your Brother Sewing Machine
To master your Brother sewing machine, always start with the basics, such as proper threading and bobbin installation. Practice sewing straight and zigzag stitches to build confidence. Regular maintenance, like cleaning and oiling, ensures optimal performance. Experiment with different stitch settings to explore creative possibilities. Use the right accessories, like the buttonhole foot, to achieve professional results. Begin with simple projects, such as straight-stitch crafts, before moving to complex garments. Watch tutorial videos for visual guidance and refer to Brother’s official resources for troubleshooting. Most importantly, be patient and persistent—mastering your machine takes time and practice. Happy sewing!